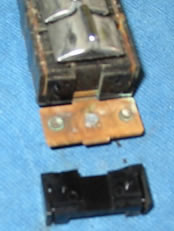

Master switch with 1st switch assembly removed.
The black plastic parts have a lip on their bottom edge that overhangs the fiber block. Since the fiber blocks are tied together there is no room to remove the plastic. My solution was to cut off the lip on the plastic piece that would be removed next. That allows it to be removed and provides space to remove the next piece without cutting.
I used a Dremel tool with a cutoff wheel on low speed and it worked perfectly. Since the plastic sides of each switch are held to the next switch with pegs in each side, the switch will still be secure when reassembled.
If you have later switches such as those used in the early 60s they come apart differently but are almost identical inside. If you pick up that switch and turn it over you will see that the switch housing appears to have been crimped over in 4 places.
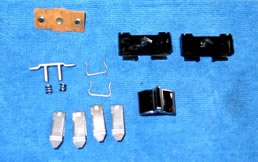
Once the switch is apart you can evaluate its problems. I started by taking all of the spring clips, the wire clips, the springs and the metal bracket that holds the springs to my bead blaster where I glass beaded them to get rid of some rust and dirt.
Here’s a tip if you have a bead blaster. I use a stainless steel kitchen sieve that I bought at a garage sale for $1. It will hold the tiniest of parts and the beads will pass right through the sieve when you are cleaning.
I have a very fine, soft rotary wire brush and I cleaned the contact points with that being careful not to press too hard. The result was the contacts became bright and looked polished. Fine emery cloth or sandpaper will achieve the same result.
Meanwhile, I soaked the black plastic pieces in a small container of soapy water. While they were soaking I turned my attention to the ‘knob’ that operates the switch. It is a stainless steel cap over a plastic knob. I took it over to my polishing wheel and in no time it looked new again.
I fished the plastic pieces out of their soapy bath and with an old toothbrush gave them a thorough cleaning. Suddenly I was ready to reassemble the switch. Of course the housing has to go out to the chrome shop so I’ll have to wait a bit to make the assembly complete.
So what about that master switch that goes in the driver’s door? Well it’s almost exactly the same as the individual switches. You’ll notice when you turn it over that on the bottom there is a strip that runs full length tying it together.
It separates from its housing the same way as an individual switch. Once the switch is out you will see that there are four individual switches tied together at the bottom. The way it’s tied together presents a problem.